Santa Pants Paper Purse

7:13 PM Posted In Edit This

Introducing my latest original design, the "Santa Pants Paper Purse". Just in time for the holidays, this purse is perfect for a lightweight tote, a gift bag, or a festive holiday centerpiece! Fast, fun, and so easy to make. I hope you enjoy this creation and have lots of fun creating many of them. For a complete, FREE tutorial full of step-by-step photos (along with a printer friendly version), please visit my website: http://www.kathiemcguire.com/. For a direct link to the Santa Pants Paper Purse, just click here: http://www.kathiemcguire.com/Photoalbum9.html
Happy Holidays everybody!!!

By The Sea

8:16 AM Posted In Edit This
Card for a local swap group! Fun group~we meet once a month at a pre-determined restaurant. The swap theme is "By The Sea" and it matches the restaurant theme: this meeting will be at The Red Lobster. Cute, huh?
I made 12 of these: 8 for the swap and 4 for my card stash (for later use)~glad I did, too because I loved them when they were completed!
Paper: Miscellaneous
Ink: Pallette Black, The Angel Co.
Stamps: Fishy Friends, Stampin' Up!
Punches: Marvy Giga scallop and Marvy Mega scallop. Corner punch by Stampin' Up! (AWESOME tool, what did I ever do without this???)
Technique: Fish colored with SU markers and Prismacolor pencils. Pencils blended with Gamsol blending fluid. Two way glue pen (Michael's) used on fish and sprinkled with glitter (Sparkle and Sprinkle Co.)
Eyelets: Set with my latest toy, Crop-A-Dile. It rocks!!!
Cuddlebug embossing folder used on plain copy paper for the bubble background. Sewn with my new Janome sewing machine. Like it? BUY ONE!! It's one of the most wonderful addition to my stamp room in YEARS!!
Bling: A WOW find at WalMart. A big old bag of them for 3.99~they are adhesive backed and easy to apply, though time consuming. The "real" use for these gems, according to the package, is for application to cell phones. What do those marketing people know????? LOL Card measures 5 1/2" X 5 1/2"

Harley Davidson Name Frame

9:40 PM Posted In Edit This 0 Comments »

Harley Davidson Name Frame for my cousin, Amy for her birthday!! Her name is Amy Jo, so look closely and you will see "Jo" spelled out in the small paper clips attached to the letter "Y"! The clips were purchased at JoAnn's Fabrics and Crafts. All of the Harley Davidson products were purchased at Michael's Arts and Crafts. The stamped images are from the (retired) stamp set "Born To Ride" by Stampin' Up! AMY is spelled out using VersaMark ink and then embossed with Platinum embossing powder by PSX. The (3) silver staples are attached with the Fastenator. The frame is from WalMart.

Happy Birthday Harley Davidson Snoopy

9:32 PM Posted In Edit This


Birthday card for my cousin which coordinates with the Harley Davidson Name Frame and Road Trip Memories Box. All Harley Davidson products were purchased at Michael's Arts and Crafts~the paper on this card is scraps left over from the Name Frame project! Tire track is Stampin' Up!'s roller wheel, corner punches are made with Stampin' Up!'s new "Photo Corners" punch, then they were paper pierced with tools from Stampin' Up!'s Crafter's Tool Kit. The chain was purchased from the jewelry department in Michael's arts and crafts and is attached with two small silver brads. The image is from Stampabilites and is stamped in Palette ink from The Angel Company. I colored the image with Prismacolor pencils and blended with Gamsol Blending Fluid. The circle the image is on was cut from my Sizzix die "Circle #1". Happy Birthday Amy!!!

Harley Davidson Box

9:31 PM Posted In Edit This

Harley Davidson Road Trip Memories Box

9:05 PM Posted In Edit This
This is a birthday gift for my cousin, a motorcycle enthusiast. I started with a cardboard cigar box; next my husband spray painted it with black gloss paint. Then, I added the Harley Davidson paper to the top of the box (I used fabric glue), added the leather-look ribbon, made a base of cardstock with black, grey, and orange paper~then added the "Road Trip" embellishment that I purchased at a scrapbook store. Corner punches used to make the corners and the orange strip across the middle has two silver brads for interest. This box does not have a sealer on top of the paper since I knew the recipient and didn't feel it would be necessary. Lastly, I added self-adhesive black felt to the bottom of the box for a more professional, finished look.

Wild West Cowboy in Blue

9:49 PM Posted In Edit This

A card for a gentleman who is the agricultural administrator at a school for troubled teen boys. They are now the proud parents of a darling cow that I helped place with them (link for cow story in previous post labeled Wild West Cowboy).
Stamps: SU Wild Wild West
Technique: Gamsol and Prismacolor Pencils

Wild West Cowboy in Red

1:49 PM Posted In Edit This

A card for an Animal Crimes Investigator who works for the county Sheriff's Dpt. He helped me with a cow. Read about the cow here: http://www.eastvalleytribune.com/story/93130

Stamp Sets: Wild West (SU, retired), Weathered (SU)

Technique: Prisma Colored Pencils, Gamsol Blending Fluid

Learn how to use Gamsol here:

Savanna Name Frame

7:09 PM Posted In Edit This

A name frame for a precious little girl who has a Winnie The Pooh themed bedroom. Most supplies Stampin' Up! (exception: Winnie The Pooh related text and images which are stickers). Frame is from WalMart.

Golf Father's Day Card~FORE!

6:57 PM Posted In Edit This

A father's day card made for a friend to give to her hubby on Father's Day. Image is stamped with StazOn Timber Brown and watercolored with Stampin' Up's Watercolor Crayons (love those things!!). Colors coordinated with the assistance of one of my all time favorite stamping tools, SU's Color Coach. Happy Father's Day to all of you fathers!!

Super Bella in Teal

5:40 PM Posted In Edit This

With a little nudge from my good friend, Gwen Mangelson, I'm finally updating my blog! Yippee!!
Here's a cheeky little card I made from a pile of odds-n-ends and paper scraps. I stamped the background, then added a black marker outline, and lastly embossed with my new Cuttlebug embossing folder for the card base. I added a SuperBella image that I got in an image swap, found the perfect colors of Prima flowers and Voila!! Instant card!! I colored the image with Prisma colored pencils and blended with Gamsol (beware~unless you want to hopelessly hooked, don't try Gamsol. There's no turning back LOL).

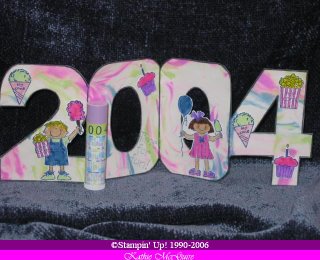
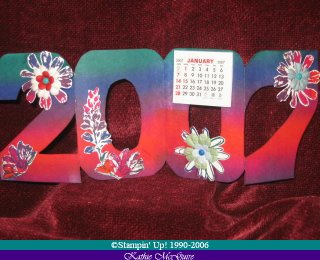
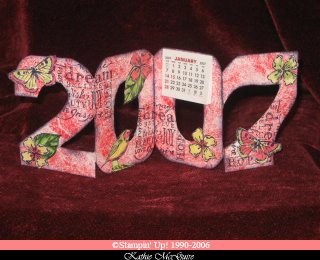
Calendar for 2007

6:06 PM Posted In Edit This


2007 Calendar
(Thanks to my friend, Hetty Sanders in the Netherlands for this project idea that I've created and enjoyed for many years!!)
Ring in the new year with this 2007 Calendar project!!
1. Create the numbers on your computer and enlarge to fill a sheet 8 1/2" X 11" (or download a copy from Hetty's website): http://www.geocities.com/hetty4you)
2. Print onto an 8 1/2 X 11" sheet of cardstock.
3. Cut around (and inside of) each number.
4. Stamp, brayer, or embellish the cardstock to coordinate with the project.
Score inbetween each number, then "Z" or "Accordian" fold so the calendar will stand up.
5. Add any other stamped images and embellishments.
NOTE: I've added a 1 1/2" X 1 3/4" pre-made calendar I purchased at www.vippies.com. OR you can print your own little calendar on your computer and cut it out, staple, and there you go!!
I also found that I love the Prima paper flowers with a brad center on the calendars. I think it's the perfect touch!! Best place to buy them: http://members.cox.net/redrubberstamps/index.htm They have them for around $4.50 for a huge bag of assorted sizes and colors. I just can't get enough of them!!