Shy Bear
9:21 PM Posted In Shy Bear Edit This 0 Comments » A darling image from I Brake For Stamps from the Shy Bear collection. I stamped the image with Black Staz On ink and colored using a technique from Technique Junkies. I sewed around each layer with my Janome Sew Mini sewing machine and added some buttons from Stampin' Up. I threaded jewelry cord through the buttonholes for a more finished look. The Get Well themed buttons are from Michael's. Find the Shy Bears at I Brake For Stamps under THE MERRY STAMPER subcategory HERE Be sure to click on THE MERRY STAMPER and then "SHY BEARS".
Aged Effects
10:48 PM Posted In Aged Effects Edit This 3 Comments »
A card made with a Walnut Stain technique I learned from Technique Junkies. Flowers are Primas. Velvet rick rack is from WalMart. Corner punch is a Cuttlebug die cut, cotton lace is from JoAnn's. Scallop edge punch is punched out of vellum paper~the scallop punch is from Martha Stewart. The stamps are Magenta clear stamps~fabulous quality for clear acrylic!! I named this technique "Aged Effects" because it looks so vintage to me. The technique name that it can be located under (with all of the info on how to really do the technique) "Walnut Stain" at the Technique Junkies subscription only page. Thanks for looking!!!
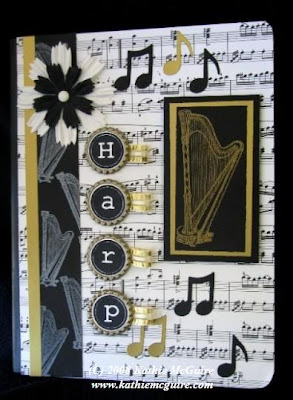
Personalized Composition Journal & Bottlecap Tutorial
4:26 PM Posted In Composition Journal and Bottlecap Tutorial Edit This 4 Comments »
This is the composition project that was featured on Friday September 19th's show, "Your Life A to Z". All of the products used on the show are from Yvonne Albritton Designs, a fabulous rubberstamp company in Renton WA. Visit the website here for the full product line and to purchase any of the products used on the show. Please enjoy the following bottlecap tutorial and learn how to make your own customized bottlecaps to decorate all of your favorite craft projects!!
Supplies used:
Scissors
Mounting foam tape
Fabric Glue
Paper Cement (made by the same mfg. of Rubber Cement)
Scrapbook paper: Yvonne Albritton DesignsBottlecaps: Yvonne Albritton DesignsColorbox Chalk Ink: Yvonne Albritton Designs
Prima Flowers
Brad
Double sided tape
4:26 PM Edit This 1 Comment »

Supplies:
Typewriter Alphabet Stamp Set: Yvonne Albritton Designs
Colorbox Chalk Inks
Bottlecaps: Yvonne Albritton Designs
Cardstock
1" circle punch
Fabric Glue
Riley Goes To Roswell
4:37 PM Posted In Potholder Notes Edit This 1 Comment »
Riley is all ready to take a trip to Roswell, NM to wish my cousin a Happy Birthday!! Looks like he's baked a cake and then decided to make a few cupcakes to go along with it. What a fun project this was!! After making the birthday card, I couldn't resist a Potholder Notes gift to go along with it. Riley makes the CUTEST cards and projects for recipients of all ages so I absolutely love Hanna Stamps for creating such a wonderful little moose!
The instructions for the Potholder Notes can be found by clicking on the link of the same name on the sidebar of this blog. The card in this photo is detailed below.
Happy Birthday Amy, from Riley and me!!


The instructions for the Potholder Notes can be found by clicking on the link of the same name on the sidebar of this blog. The card in this photo is detailed below.
Happy Birthday Amy, from Riley and me!!


