"Tips, Techniques, and Secrets of the Paper Crafting Pros"

10:25 AM Edit This
Don't forget about my new 2 book set on CD: "Tips, Techniques, and Secrets of The Paper Crafting Pros" (for more info, scroll to the end of the Blog or click on the book's title on the left hand side of the screen).

Pencil Pouches

9:50 AM Posted In Edit This


Pencil Pouches
©Copyright 2006 Kathie McGuire

Supplies:
Ribbon
Ink Pads
Crimper
Rubberstamps
Scoring tool
Decorative Button
Decorative Scissors
5 ½” X 8 ½” piece of cardstock
Two sided tape (the heavy duty type)

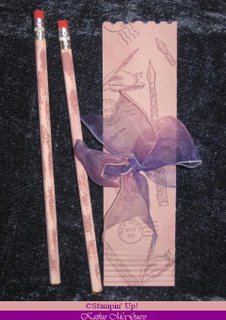
Begin by scoring the cardstock lengthwise at 2” and 4”. Fold the cardstock and crease on the scored lines. Unfold and lay flat, then stamp/decorate .On the unstamped side, apply two sided tape along the BOTTOM edge. Then, apply two sided tape along the edge of the section that measures 1 ½”. Fold the cardstock at the scored lines and press to secure the pencil pouch along the edges with the two sided tape. Next, crimp the end of the pencil pouch to approximately 1”. Then, cut the pouch top with the decorative scissors to create an interesting edge. Insert two pencils into the pouch and finish with the decorative ribbon and coordinating button.

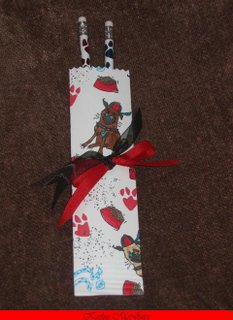
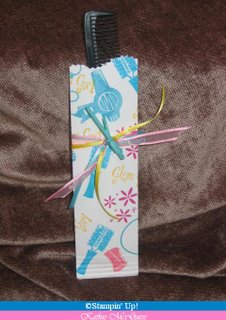
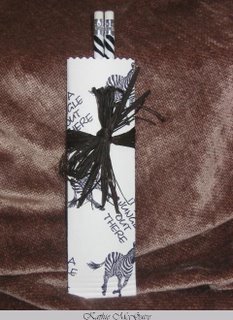
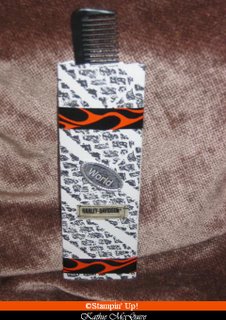
Kathie's Comments: These pouches are fabulous gift giving projects for more than just pencils! Here are a couple of ideas (see the photos for a great visual): Nail files/Emery Boards (how about for your favorite nail tech?), Combs (a very clever idea for a hair stylist or a great gift idea for the motorcyclist in your life suffering from the dreaded "helmet head hairdo"), Paint Brushes (for the aspiring artist in your life), or a Bookmark (for your bookworm friend). You are only limited by your imagination for the contents and theme of this great gift giving packaging!!

Bonus Tip: Most craft stores and other retailers carry a variety of "theme related" pencils (dog paw prints, holiday images, etc) so take advantage of the product by making a coordinating pencil pouch for your theme related pencil (see the "Zebra" theme pencil pouch in the photos. Also the "Dog" theme pencil pouch. Both pencils were purchased in a craft store).

Big Bonus Tip: Don't have a pencil to match your color theme? Paint it with acryclic paint! It only takes a few minutes and WOW, what a difference. For a great example of painted pencils, see the mauve "Letter Writing" theme pencils above. They were painted with a paint brush and an inexpensive acrylic paint available in most craft and retail stores. Then, the second coordinating color was simply sponged on with a make-up sponge. (As a note, there is no need to sand or prep the pencils first.)An instant color match and a great way to make your project look like it came from a chic boutique!!

Stationery Pocket Folder Gift Set~Tutorial

5:13 PM Posted In Edit This 3 Comments »


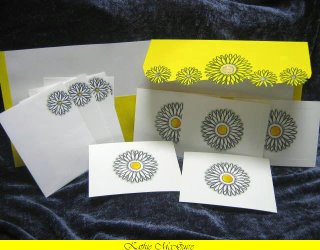
Pocket Folder Stationary Set
as seen on "Your Life A to Z" September 5, 2006
Supplies:
Ruler
Pencil
Ribbon
Scissors
Stylus or bone folder
9” X 12” pocket folder
5 sheets of 8 ½” X 11” white 20# bond
Large Stamp and coordinating smaller stamps
Ink pads in color to coordinate with the folder
5 A-2 envelopes (white or any color to coordinate with project)

Create the folder:
On the front of the folder, measure 7” from the bottom and mark a small pencil mark on the right edge of the folder. Repeat on the left side of the folder. Make a horizontal pencil mark across the folder at the 7” marks.

With scissors, cut the folder from the right edge to the left, stopping at the folder’s spine. From the top edge of the folder, cut along the spine, stopping at the horizontal cut. Remove that portion of the folder and set aside.

On the back of the folder, score a horizontal line from left to right at the 7” mark. Then, fold the back portion over the front to create a flap.

Stamp the flap of the folder with a large stamp or decorate as you desire.

Create the stationary pieces:
· Cut 8 ½” X 11” paper to 5 ½” X 8 ½”
· Stamp each sheet of paper with the smaller stamps
· Stamp each envelope with the smaller stamps

To complete the stationary gift set, place the letter sheets inside one of the folder’s inside pockets, and the envelopes in the other pocket.

Kathie’s Comments:
Here are a few ideas:
Secure the folder flap with a small piece of hook and loop tape on the back side of the folder flap. Place the opposite piece of the tape on the folder body.
Hold the folder closed with a piece of ribbon tied on the left side and another piece tied on the right side.
Secure the folder flap by using the same method as the ribbon, except elastic cord.
Add interest to the folder flap’s corners with corner punches
Add a nice decorative edge to the folder flap by cutting with decorative scissors.